Payload CMS installation
Installing Payload CMS Locally and Restoring PostgreSQL Dump
Section titled “Installing Payload CMS Locally and Restoring PostgreSQL Dump”Unzip your Payload CMS project to a desired location, e.g.
C:\Users\milan\Desktop\cosmusInstall Dependencies. Open Command Prompt in the project folder and run:
pnpm iCreate PostgreSQL Database. Go to your PostgreSQL bin folder::
cd "C:\Program Files\PostgreSQL\18\bin"Connect to PostgreSQL.
psql -h 127.0.0.1 -U postgresEnter your password (postgres in this example) when prompted.
Create the Database.
CREATE DATABASE test1;Locate the backup file. Inside the main project folder, you will find the database backup file named:
cosmus.backupRestore Database Dump Use pg_restore to load your backup file:
pg_restore -d "postgres://postgres:postgres@127.0.0.1:5432/test1" "C:\Users\milan\cosmus.backup"Configure Payload CMS Set your PostgreSQL connection URL: inn .env
DATABASE_URL=postgres://postgres:postgres@127.0.0.1:5432/test1PAYLOAD_SECRET=your_secret_keyPORT=3000Start Payload CMS Locally
Open Command Prompt in your project folder.
Run:
pnpm devOpen a browser and go to:
Run:
http://localhost:3000/adminYou should see the Payload CMS admin interface with your restored data.
Installing Payload CMS on a VPS
Section titled “Installing Payload CMS on a VPS”Upload the project files. First, upload the
botify.zipfile to your VPS using FTP, SCP, or your preferred file transfer method.scp main.zip root@your-server-ip:/var/www/Unzip the project once uploaded.
cd /var/www/sudo unzip cosmus.zip -d cosmusNavigate to the project directory.
cd /var/www/cosmusUpdate the
.envfile with the correct credentials and configuration values.NEXT_PUBLIC_SERVER_URL=http://localhost:3000DATABASE_URL=postgresql://myuser:mypassword@localhost:5432/my_databasePAYLOAD_SECRET=e508b874afbf9bdb8d9778d7SMTP_HOST=SMTP_USER=SMTP_PASS=PAYLOAD_ENABLE_JOB_QUEUE=trueWHATSAPP_API_KEY=PAYLOAD_DEV=falseNODE_ENV=productionORGANIZATION_NAME=Cosmos Beauty ClinicRun the following command to install all project dependencies.
pnpm iExecute the initial database migrations.
pnpm migrateStart the application.
pnpm startKeep your Node.js application running continuously in the background with PM2.
pm2 start pnpm -- start
Payload CMS Installation with Docker
Section titled “Payload CMS Installation with Docker”Note: Botify Docker installation requires an extended license. Please contact us for more details.
Upload the project files to your VPS using FTP, SCP, or your preferred transfer method.
scp cosmus.zip root@your-server-ip:/var/www/Unzip the project once uploaded.
cd /var/www/sudo unzip cosmus.zip -d cosmusNavigate to the project directory.
cd /var/www/cosmusOpen the Dockerfile in the root directory and update it with the correct port and configuration settings.
FROM node:20-alpine AS builderRUN npm install -g pnpmWORKDIR /appCOPY package.json pnpm-lock.yaml ./RUN pnpm install --frozen-lockfileENV DATABASE_URL=postgres://postgres:postgres@db:5432/cosmosENV NEXT_PUBLIC_SERVER_URL=https://beauty.codenik.inENV PAYLOAD_SECRET=secretENV NODE_ENV=productionENV PAYLOAD_DISABLE_DB_PUSH=trueCOPY . .RUN pnpm buildFROM node:20-alpine AS prodWORKDIR /appCOPY --from=builder /app/.next/standalone ./COPY --from=builder /app/public ./publicCOPY --from=builder /app/.next/static ./.next/staticEXPOSE 3000ENV PORT=3000ENV NODE_ENV=productionENV PAYLOAD_DISABLE_DB_PUSH=trueCMD ["node", "server.js"]Open
docker-compose.ymlin the root directory and update it with the correct port and configuration settings.services:cosmos_payload:build: .container_name: cosmos_payloadvolumes:- ./public/uploads:/app/public/uploadsports:- "3000:3000"depends_on:- dbrestart: unless-stoppedenvironment:NODE_ENV: productionPAYLOAD_SECRET: secretPAYLOAD_DISABLE_DB_PUSH: "true"DATABASE_URL: postgres://postgres:postgres@db:5432/cosmosPAYLOAD_PUBLIC_SERVER_URL: https://beauty.codenik.innetworks:- default-netdb:image: postgres:15container_name: cosmos_dbenvironment:POSTGRES_USER: postgresPOSTGRES_PASSWORD: postgresPOSTGRES_DB: cosmosports:- "5432:5432"volumes:- postgres-data:/var/lib/postgresql/datanetworks:- default-netvolumes:postgres-data:networks:default-net:driver: bridgeVerify containers are running.
sudo docker psYou should see containers for:
- botify-web (Next.js app)
- postgres
Start the application using Docker.
sudo docker compose up -d --buildAccess the application.
http://yourdomain.comYou will be automatically redirected to the onboarding page.
SuccessYour Payload CMS cosmus template is now successfully installed and running in a secure, Dockerized environment.
Create admin account.
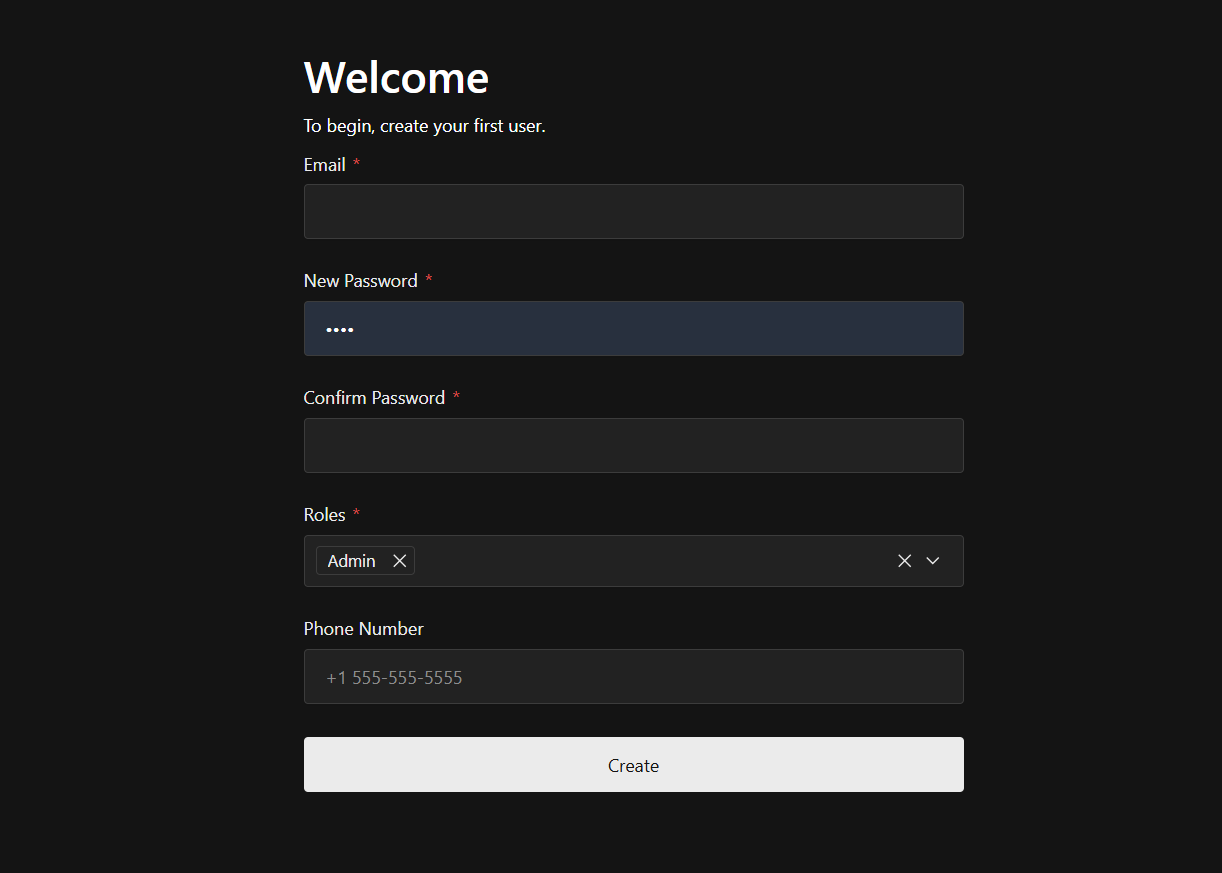
Note: The first user typically has full administrative privileges and can create additional users and manage roles.